NORTHEAST MOUNTAIN PEOPLE
  • On Hiking (Home)
    • Southern New England Highest Summits
    • White Mountain Parsnip
  • About
  • Links

Interviews~ Reflections ~ Reviews ~ Reports ~ Advice ~ Humor 


WINTER (hiking) IS COMING! Are you ready?

11/26/2021

0 Comments

 
Picture
Although it isn't officially winter until December 21 (winter solstice), the weather gods don't care--they'll gleefully dump snow and freezing temperatures on us any day now (and have already got started in the mountains). Being prepared for safe winter hiking in the mountains of the northeast United States means having winter-worthy gear and a matching attitude. If you're contemplating winter hiking in the mountains for the first time in your life, unless you're a witless person you're probably at least a little anxious about preparation. But even experience doesn't always translate into preparedness: there's a little corner of hell reserved for us old timers called complacency. Whether new and anxious or old and careless, I hope you'll find this bulleted list helpful in your prep for the snow, ice and negative digits. 

Gear inventory and prep:
  • Base layers: Check winter clothing base layers (underwear, shirts, pants, fleece jackets and vests) for wear and tear. Pay attention to belt draw strings and cord-locks, zippers, stretchy cuffs and waist bands, and seams. Does everything still fit well? Is anything broken or worn? 
Picture
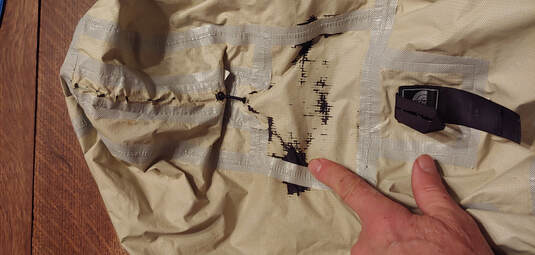
The waterproof/breathable layer has delaminated on the hood of this Marmot shell jacket, making it unreliable.
  • ​​​Shell layers: jackets, pants, gaiters, and outer mittens: Check both the inside and outside of the shell items for signs of wear, along with velcro, cord locks, drawstrings, and zippers. If you find that the breathable layer inside the shell is starting to delaminate from the outer layer, your shell is toast: time to buy a new one. But loss of waterproofing might be less noticeable, and waterproofing can become compromised (but not necessarily ruined) by dirt. Check out these instructions for cleaning and re-waterproofing your shell. Once you've done what you can do, it's time to test your shell. Put it on and get in a cold shower for about ten minutes, turning around a few times to get the water on all parts of the layer but not down the cuffs or into the hood. Hop out of the shower, dab off the outer water with a towel, and pull the shell inside-out to look for leakage. Don't be surprised if your shell is worn out--even the best quality shell jacket will retain good waterproofing and optimum breathability not much longer than a couple years of heavy use (less if abused). Mittens and pants, which typically see less intensive use, may last longer. 
  • Puffy jackets and vests: Check for tears in the fabric where down may be escaping. Rips can be repaired temporarily with duct tape but should be patched or pinched and sewn shut. Check for warmth: down and synthetic fibers will become degraded and compressed over time, reducing insulation value. If your jacket feels less warm to you this winter, it might be the jacket, not your metabolism. 
Picture
Pinched and sewn hole in a Columbia puffy down jacket. Some down was caught in the stitch.
  • Socks, mittens, hats, gaiters, buffs, and gloves: Check these items for thinning, rips, and wear holes. Thinning sock fabric will reduce insulation value and may cause other problems like blisters and inner boot fabric wear. 
  • Boots: Check boot seams and soles for delamination. Check the inside from toe to heel to see if the fabric it's worn through to the insulation layer. Make sure boot inserts are in good shape and not mildewy or worn through. Check the boot tread for excessive wear ("baloney skins"). Clean the boots (wash in cold water and dry thoroughly) and give them whatever annual waterproofing treatment the manufacturer calls for. Patch small tears and small delaminations with Shoe Goo or similar flexible and waterproof adhesive product, let dry for a day, then put the boots on and walk around to see if the repairs hold. To check for waterproofing, put the boots in a dishpan or sink and fill it up to a few centimeters below the upper end of the waterproof outer. Let stand for ten minutes, put the boots on without socks, and see how damp they are. Finally, walk around with them to see if they still fit you well. 
  • Goggles: Check straps, strap hardware, casing, and seams for wear and cracks; check optics for scratching which can reduce optical quality and increase fogging. 
  • Traction and axes: Check points for dullness. Check straps and stretchy webbing for cracks and rips; check chains for weak or broken links. Spikes can easily be sharpened with a tabletop grinder or more tediously with a file; or you can farm out the task to any shop that sharpens knives or landscaping equipment (note that each sharpening will reduce the length of the spikes, making them a little less effective each time. (Traction gear with longer spikes, like Hillsound Trail Crampons, will endure more trips to the sharpener than short spike brands like Microspikes). If you have adjustable crampons, be sure to check the adjustment pins and make sure they are pre-set to the length of your winter boots. Check ax hardware and tips for loose hardware connections. Sharpen the pick as necessary.  
Picture
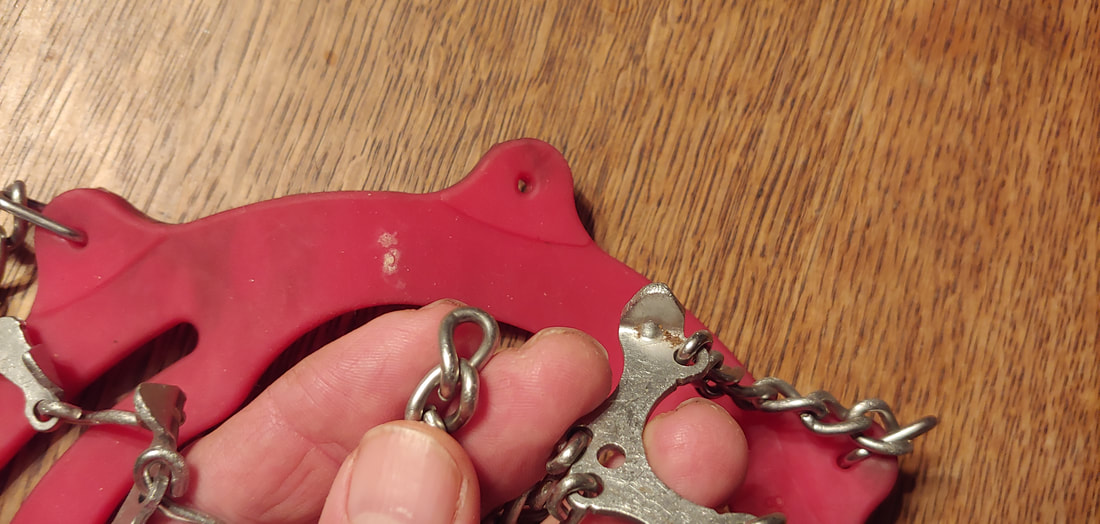
No bueno: broken chain link and dull points on these Microspikes.
  • ​Snowshoes: Check all parts of the snowshoe for tears, rips, cracks, broken fasteners, and other signs of entropy. Strap them to your boots and walk around in soft turf or sand for a few minutes to see if they are working well. Check traction points and sharpen as necessary. Spray hinges with teflon dry lube spray. Most snowshoes can't easily be repaired at home--if you have problems, you may have to send them back to the manufacturer to fix (TSL brands snowshoes can be easily repaired at home with ordered replacement parts, including new crampon points). If you need to send away for repairs, be prepared to rent, borrow, or buy a replacement while you wait (it's always wise to check snowshoes in the spring and deal with repairs over the summer). 
  • Skis: Check skis and bindings for signs of wear, paying close attention to all surfaces including edges. Bring skis to a pro shop for proper  tuning and treatment. As a rule of thumb, skis should be tuned about once every 20 full days of use, but that's a rough average that doesn't take into account a lot of variables. If you used your skis a lot the prior winter without tuning, it's probably wise to bring them to the shop for a look over.
  • Poles: Check ski and trekking pole baskets, tips, shafts, segment binding fittings and/or cords, and wrist straps for wear and cracks. Use a piece of coarse wool or (lightly) a plastic scrubbie to clean oxidized debris and dirt from pole segments, then use a dry-drying Teflon-based lubricant spray to keep them sliding smoothly. Test poles: walk around with them a bit, adjust the length of adjustable poles and collapse them, and put a little pressure on the poles to see if the adjustments hold. Tighten any loose segment adjustments. Look down the length of the poles to check for warping. Warped poles are more likely to break and can't easily be straightened without making them worse--replace any warped poles or pole segments. Broken ski baskets and worn tips can be tricky to replace at home--bring to a ski pro shop for care. 
Picture
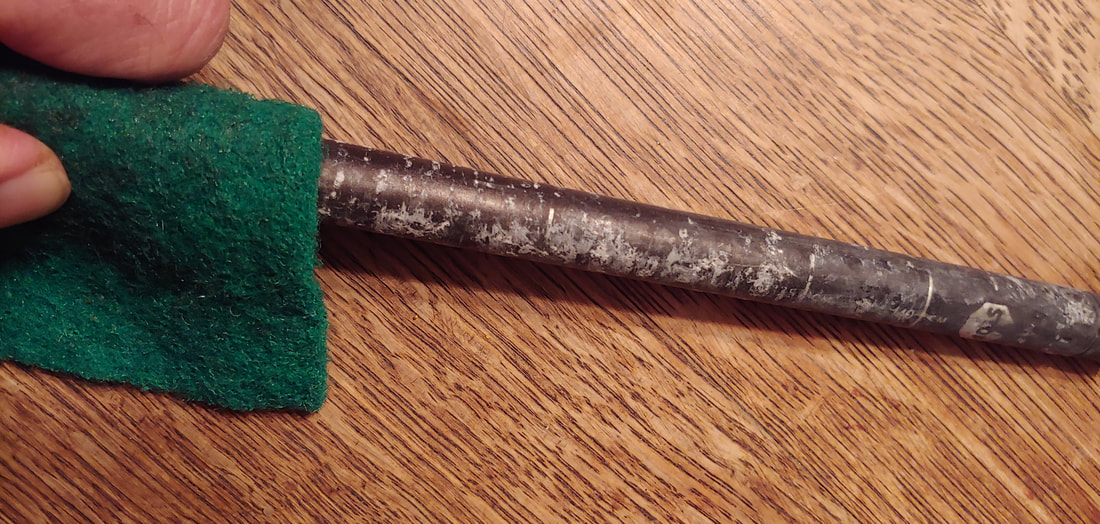
Removing chemical oxidization from this collapsible ski pole. with a plastic scrubbie.
  • Backpack: Check all parts of the backpack for wear. Pay special attention to buckles, straps, bottom panel, zippers, side pockets, and frame stays. Place a kitchen trash bag in the bottom of your pack and leave it there as an emergency inner waterproof layer for damp days. It's cheaper and more effective than a pack cover. 
  • Water bottles: check for cracking and leakage. 
  • Headlamps: Remove old batteries and replace with new lithium batteries (lithium performs better in cold temperatures). Check the brightness, straps, and casing, and refamiliarize yourself with the lamp settings. Make sure you have spare, fresh batteries in your long-day or overnight kit. Dispose of any batteries you are not sure of. 
Picture
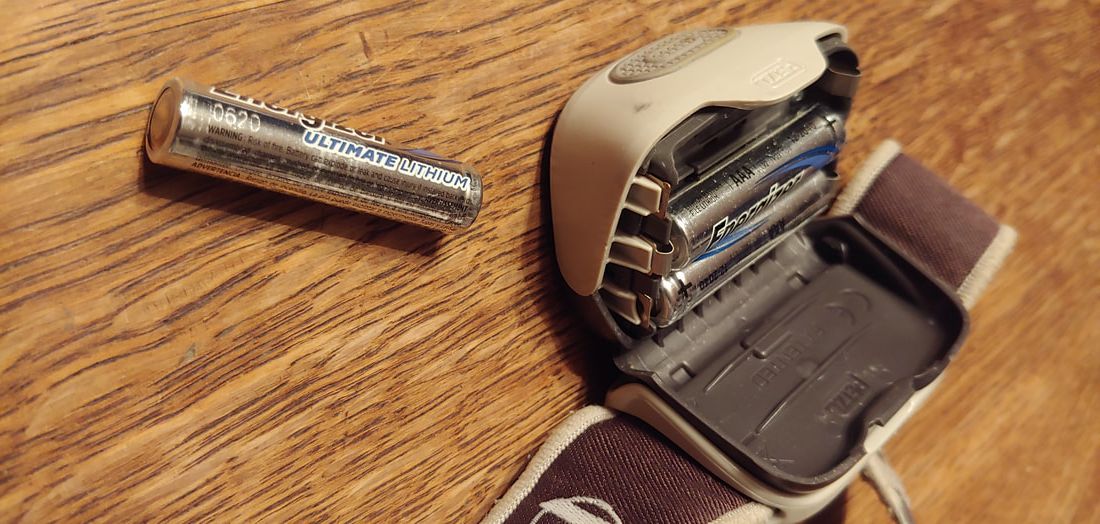
Replace old headlamp batteries with new lithium batteries (which hold up better in cold temperatures).
  • Emergency kit/items: Check your first aid kit for adequate stock, and item wear and tear. Replace items as needed. Consider adding in a small vial of sunscreen for snow-glare, some electrolyte tablets or goo, some hand and/or foot warmers, and some moleskin for those feet that haven't worn winter boots in months. Replace any expired warmers with new ones (some warmers will expire before their expiration date--if a warmer feels grainy or hard to the touch or has had its wrapper breached, it's expired). Unroll and check emergency bivy bags and space blankets for wear and mildew. Mildew compromises waterproofing--if you have it, it's probably time for a new bivy (I always dry out my emergency bivy after each hike, even if I don't use it). Clean and check multi-tools and swiss army knives. Sharpen dull knife blades. Check your compass for cracks and dial readability. Check your emergency contacts & I.D. card for current information. 
Picture
Although these warmers will expire next year, I check them by feeling them through the plastic wrapper: if they feel grainy, they're no longer good.
  • Overnight (or emergency overnight) gear: Check sleeping bags for rips and patch or sew shut. Check for warmth by laying in the bag for an hour on a very cold night outside your house with a known temperature outside: if the sleeping bag no longer lives up to its cold rating, consider replacing it and/or downgrading it to a three season bag. A failing bag can be augmented with a emergency bivy or bag liner, but that increases the total weight of the warmth. Check all stoves for proper functioning: place stove and fuel in your freezer for a few hours before testing. Make sure fuel cannisters aren't low or depleted. If you use liquid fuel, use fresh fuel, not aged fuel, for winter trips. Check fire starting tools (matches, lighter, etc) to make sure they are adequate and functional. Seam-seal tents and check for rips and failing hardware. To check for waterproofing, set up and leave in your yard on a rainy day, then check for leaks. 
  • Electronic devices: Check your phone battery by putting the phone in your freezer for about 20 minutes to see if it crashes. Some phone models will mistakenly read cold temperatures as low battery level and will spontaneously shut down. If your device does this, consider getting a new battery or new phone, or else take extra precautions in keeping your phone warm while you hike. Check external backup phone batteries to be sure they hold a charge. Make sure any critical GPS apps on your phone are up-to-date and pre-loaded with the areas you intend to hike in (see my article on this subject). Dedicated GPS devices, location beacons, and cameras: check device function and subscriptions, replace worn batteries. Watches: replace batteries at the start of each winter season. 
  • Maps: Make sure your maps are in good shape and are still legible.
Picture
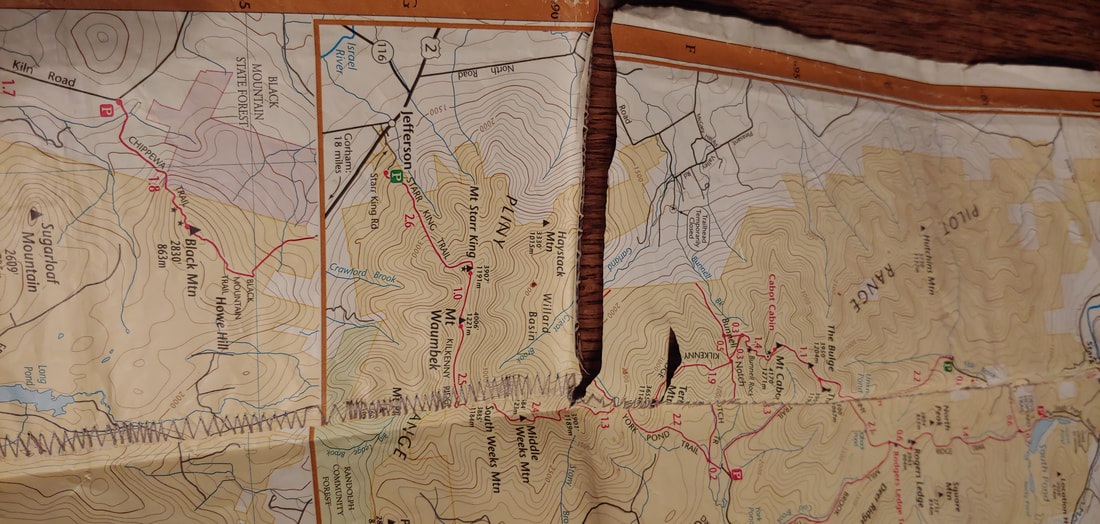
Cheapskate that I am, when this synthetic map started to rip a the seams, I sewed it back together with my sewing machine. But maybe it's time to replace it?
  • ​Club memberships, parking permits, "Hike Safe" Card, etc.: If you use these where you hike, be sure your subscription is up to date. 
  • Your ride: As I frequently remind people, statistically speaking you're more likely to die in a car accident on the way to a hike than you are to die while hiking. With that in mind, make sure your car has a good set of snow tires, and is otherwise winter-worthy and road worthy. Winter is not a time to be messing around with a worn out battery, failed heater, worn wiper blades, empty wiper fluid basin, worn brake shoes, or thin tire treads, especially if you're driving a bit to get to trailheads. I like to carry a collapsible snow shovel (a short-handled metal square shovel may be an ever better tool) in the back of my car for winter, and I always carry jumper cables, window scraper, a reflective break-down placard, a spare tire, a big can of Fix-A-Flat, a good car jack, a tow strap, a tire plug kit, and a tire pressure gauge. Some people like to also carry traction devices to help them get unstuck at snowy trailheads and on back roads.  
Picture
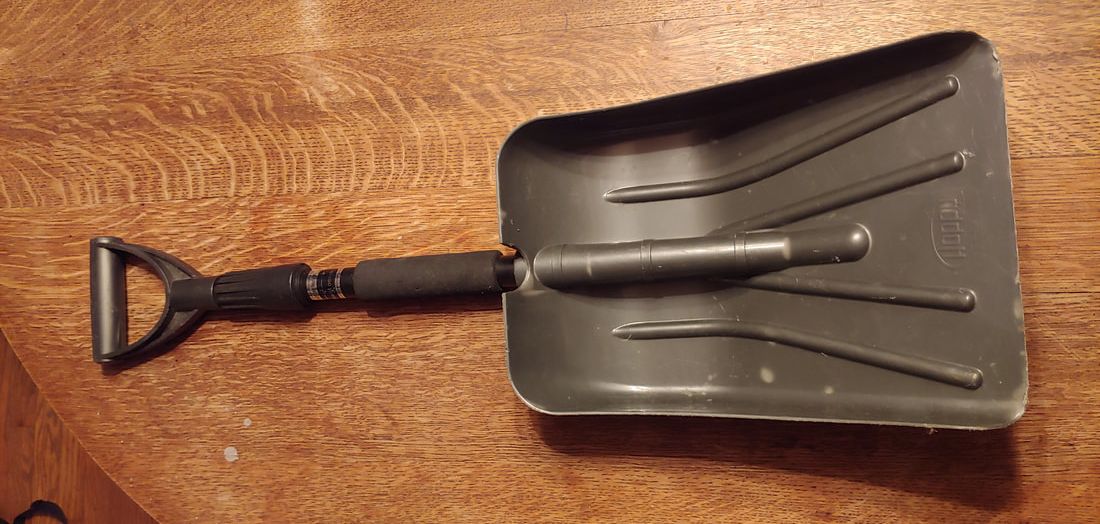
I keep this folding shovel in my car just in case I get snowed in at a trailhead.
​Mental and physical preparedness: 
  • Research: If you have specific winter hiking goals, research your trips in advance, paying attention to routes, potential bail-out/ escape routes, and typical trailhead parking and trail winter conditions on your route. Most trail conditions report websites allow you to look back in time and read last winter's reports. 
  • Backup bag: Consider keeping a few key spare items in a duffle bag in the trunk or back of your car, in case you (or a friend) forget to bring them. I keep extra lithium batteries and handwarmers, a single set of base layer clothing, socks, hat, gloves, buff, mittens, a few energy bars, empty spare water bottle, a couple spare maps covering areas I frequently hike in, and a simple gear repair kit with cord, straps, duct-tape, gear-ties, and needle & thread. I also use my car to store my light traction and snowshoes, so that I never forget them (but I bring my poles in to dry so that the adjustable sections will not freeze up).
  • Your body: Once you have your gear in order and have done your preparation, it's time to do 2-4 late fall, moderate shake-out hikes on familiar and less risky terrain during winter conditions (snow, cold temps). Bring your full complement of gear, even if you don't need it all, to help your muscles and cardio system get used to carrying the extra winter gear weight. Assess your conditioning on these hikes and use it as a baseline to determine the difference between what you're ready for now, and what you need to work up to. Pay attention to any signs your body is giving you that may suggest medical issues that need assessment or attention. ​ ​
Picture
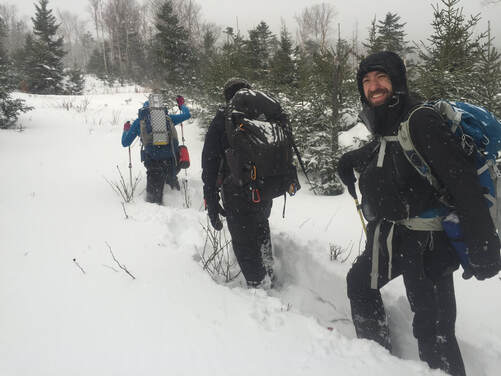
A lot of preparation went into planning the non-traditional route for this successful 2016 hike up East Kennebago during a blizzard.
  • Get in the habit of periodically checking your gear over course of the winter season as described above, to reduce unwelcome surprises in the middle of nowhere. Sometimes even a small gear failure on a winter hike can set into motion a series of unfortunate events. Preparedness takes the edge off those odds. 
Safe winter hiking to you all!--Paul-William

0 Comments


Leave a Reply.

    TOPICS

    All
    Advice
    Gear
    Great Small Peaks
    Hazards
    Hikes To Try
    Mountain People
    Nature
    Philosophy
    Trip Reports

    Humor (The Parsnip)

    RSS Feed

    Picture
    Visit Our Facebook Page


    Picture
Proudly powered by Weebly
  • On Hiking (Home)
    • Southern New England Highest Summits
    • White Mountain Parsnip
  • About
  • Links