 Although it isn't officially winter until December 21 (winter solstice), the weather gods don't care--they'll gleefully dump snow and freezing temperatures on us any day now (and have already got started in the mountains). Being prepared for safe winter hiking in the mountains of the northeast United States means having winter-worthy gear and a matching attitude. If you're contemplating winter hiking in the mountains for the first time in your life, unless you're a witless person you're probably at least a little anxious about preparation. But even experience doesn't always translate into preparedness: there's a little corner of hell reserved for us old timers called complacency. Whether new and anxious or old and careless, I hope you'll find this bulleted list helpful in your prep for the snow, ice and negative digits. Gear inventory and prep:
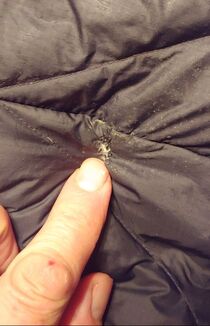
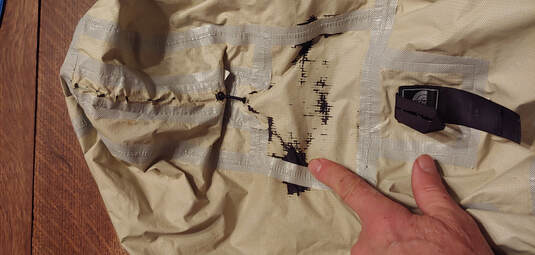 The waterproof/breathable layer has delaminated on the hood of this Marmot shell jacket, making it unreliable.
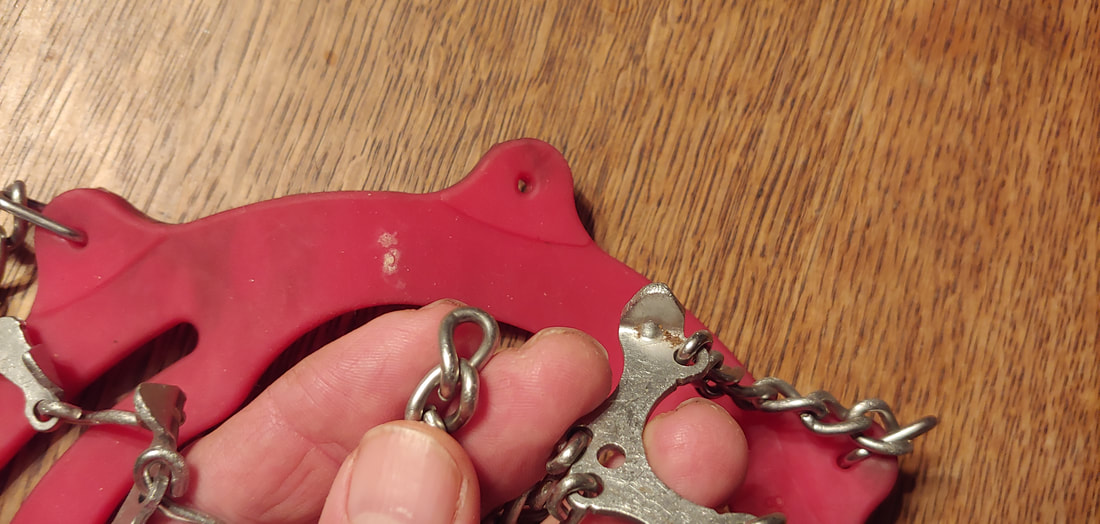 No bueno: broken chain link and dull points on these Microspikes.
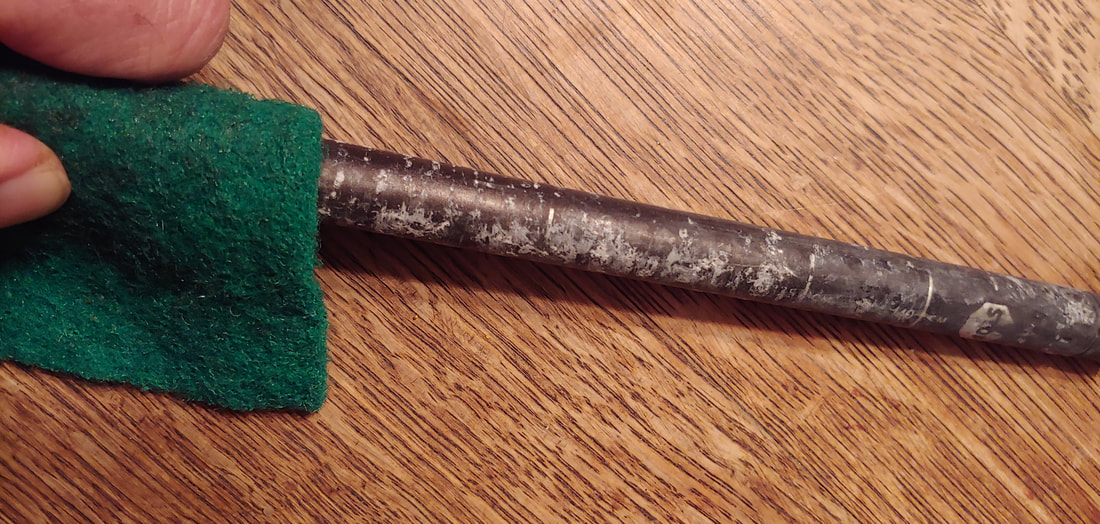 Removing chemical oxidization from this collapsible ski pole. with a plastic scrubbie.
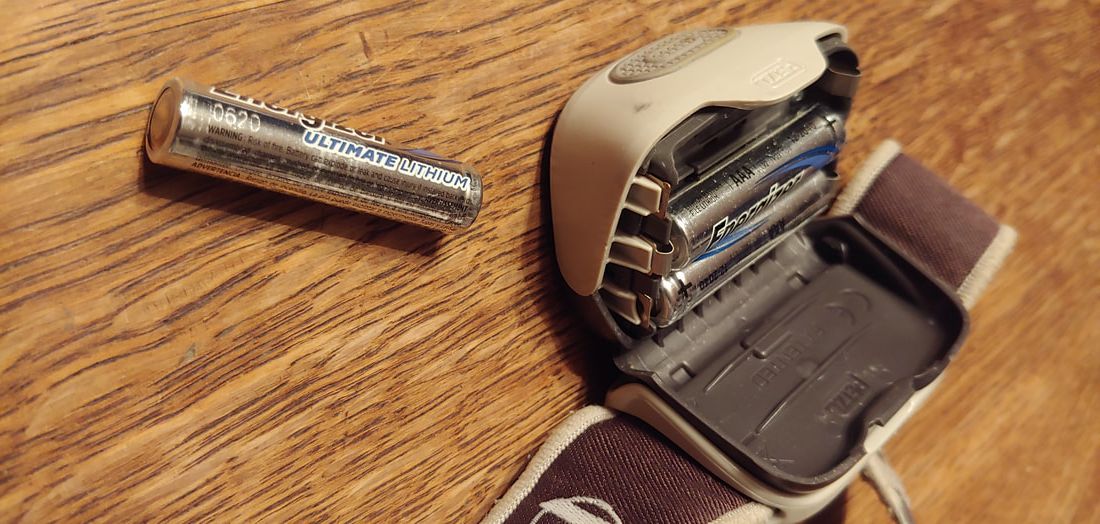 Replace old headlamp batteries with new lithium batteries (which hold up better in cold temperatures).
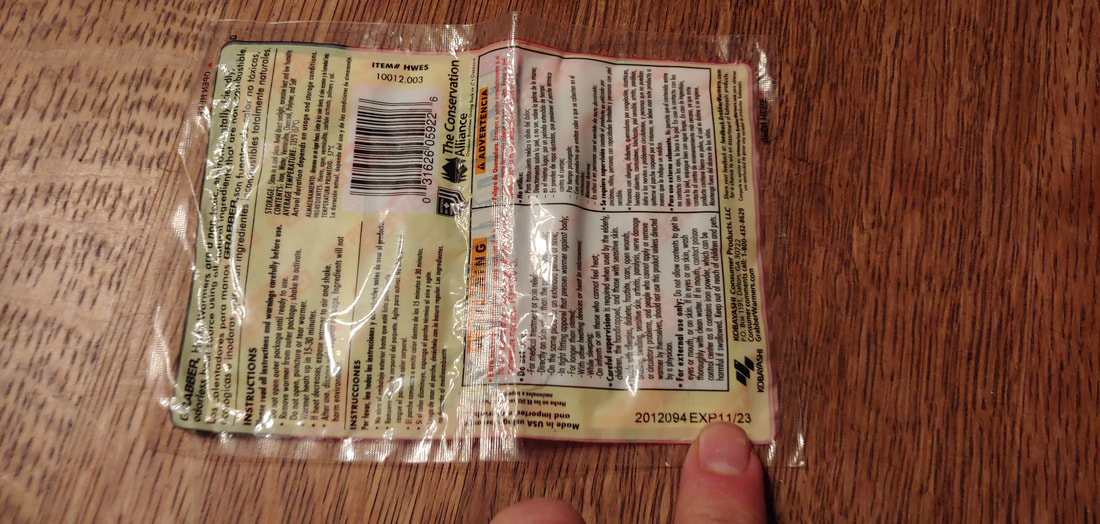 Although these warmers will expire next year, I check them by feeling them through the plastic wrapper: if they feel grainy, they're no longer good.
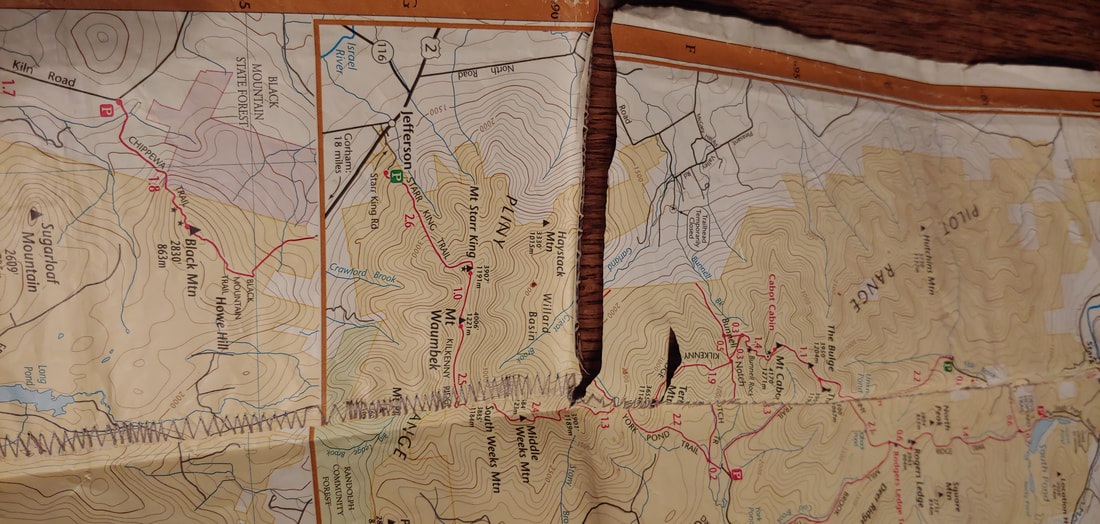 Cheapskate that I am, when this synthetic map started to rip a the seams, I sewed it back together with my sewing machine. But maybe it's time to replace it?
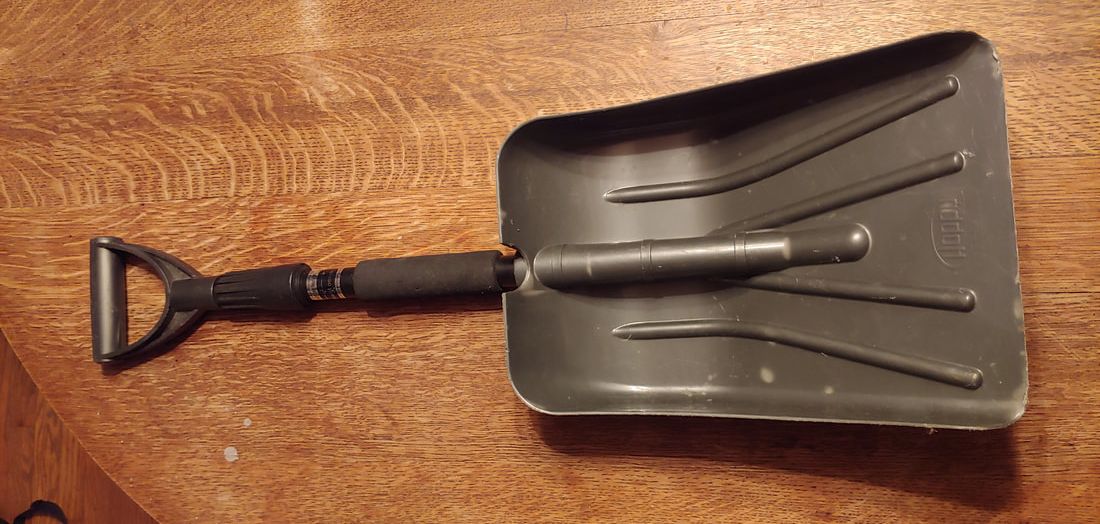 I keep this folding shovel in my car just in case I get snowed in at a trailhead. Mental and physical preparedness:
 A lot of preparation went into planning the non-traditional route for this successful 2016 hike up East Kennebago during a blizzard.
0 Comments
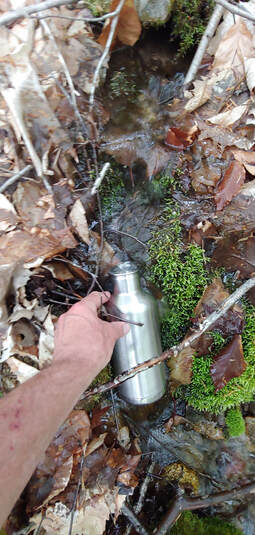
THE BASICS Water is (almost) everything Dehydration on a hot day can result in debilitating heat exhaustion or life-threatening heat stroke. If you don’t have a cast-iron gut like me (I frequently drink untreated mountain stream water), either bring plenty of water with you and/or bring a means of purifying wild water. Unfortunately, “plenty” is relative to your individual physiology and physical conditioning, the environmental conditions you’re hiking in (shade/full sun, temperature, wind, humidity), your level of activity, what you consumed prior to and during hiking, and the distance and elevation gain you are hiking.
It’s not just water, it’s electrolytes: When you exert yourself, especially on humid days, you sweat out important nutrients (especially sodium and potassium) that balance the chemistry of your body. If that chemistry is out of balance, you can “bonk”, i.e. lose energy rapidly, become nauseous, experience painful muscle cramps, or collapse. Electrolyte imbalance can exacerbate conditions that lead to heat exhaustion and heat stroke. To compensate for electrolyte loss, practice nutritional eating habits (especially in advance of your hike) and bring balanced food with you and/or bring electrolyte supplements. Natural foods that are good for electrolyte balancing include dairy products (including cheese, yogurt, and powdered milk), coconut water, pomegranate juice, watermelon, avocado, spinach, and bananas. 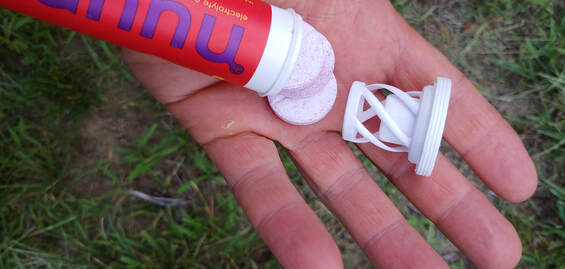 Nuun electrolyte tablets Manufactured electrolyte supplements come in a variety of forms including pre-mixed drinks (like Gatorade), tablets to mix with water, “goo” or gel form supplements, and certain brands of energy bars. In the summer I always carry emergency electrolyte tablets in my 1st aide kit and I usually eat a couple bananas as part of my pre-hike breakfast. Some people pre-treat their to-go water with electrolytes. You can even freeze a liter of juice and or electrolyte water mixes the night before and enjoy a cool drink along the trail. If you are carrying a sleeping bag with you, you can wrap a pint or quart of ice cream in the bag, which will insulate it from melting for hours even on really hot days, and enjoy a cold and electrolyte-rich ice cream lunch.
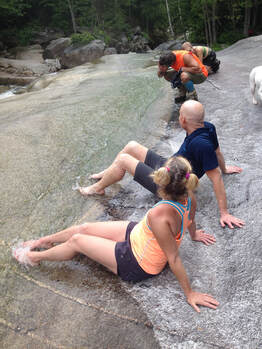
Hats with broad brims offer the best head protection but even a baseball cap will offer some sun protection. During your hike you can cool yourself by dipping your hat, bandana, shirt, or small pack towel in a creek and letting the water run over you, or plunge right in and take a dip—your clothing will likely dry off quickly on a hot day, but you could also take along a spare pair of shorts and a small pack towel. When resting, take your boots and socks off and let your feet cool (this will help reduce friction blistering, which is exacerbated by hot boots). For this reason, trail runners are often a better option than thick hiking boots on hot days. Lastly, remember sunglasses because. . . The devil is in the sun. If your route involves moderate to significant sun exposure (i.e. not just hiking heavily forested trails), bring sunscreen with a high SPF level (50+). If you do get sunburn, you’ll want to protect your skin from further damage; in such cases it’s wise to have brought a lightweight long sleeve shirt with you or an ultralight windbreaker. This can be helpful when your burnt skin—now less able to thermoregulate your body temperature—results in you getting a chill rapidly when temperatures drop later in the day (it’s even possible to become hypothermic by way of sunburn). Be aware that sunburn can contribute to heat exhaustion and heat stroke (as well as increasing your risk of developing skin cancer) by direct heating and by reducing your skin’s ability to thermoregulate. 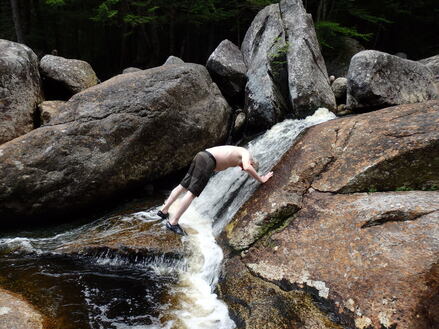 Hiker cooling off under a cascade. Understand the symptoms of dehydration and act to remedy it immediately. Quench your thirst when you feel thirsty. Eat when you feel hungry. Stop and rest (preferably in the shade or in a breezy area) when you feel tired. Don’t wait until you’re exhausted. Examine your urine when you pee: dark yellow urine is a sign of dehydration; whitish urine is a sign of good hydration. Intentionally slowing your pace and resting more frequently can help reduce overheating and dehydration, too. 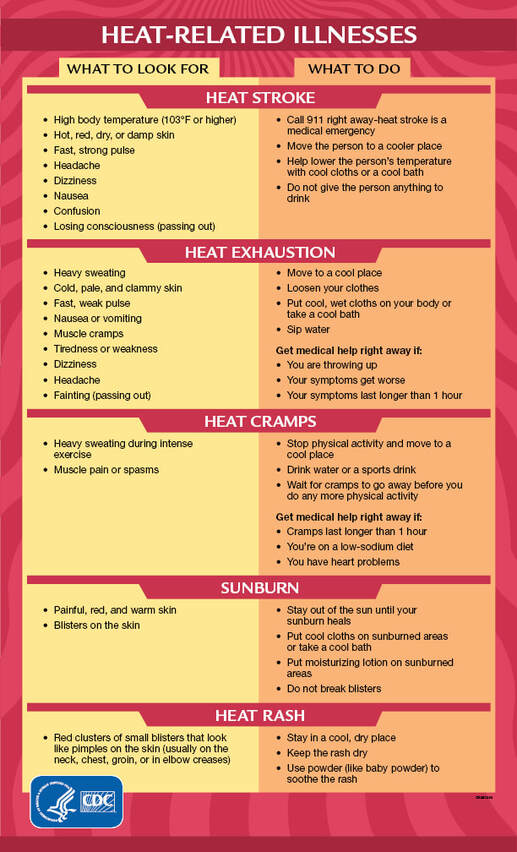 Image: CDC Understand the symptoms of heat exhaustion and heat stroke (follow the link for the full run-down). In a nutshell, heat exhaustion begins to develop when you’re moderately dehydrated, with or without an electrolyte imbalance. It is characterized by moist skin (often described as clammy or cool, but not always so if someone has been exerting themselves), exhaustion, and can include dizziness, muscle cramping ("heat cramps") and nausea. Heat exhaustion is treatable by getting yourself in the shade and/or cooling yourself in a brook, drinking and eating to replenish lost water and nutrients, and resting. If left untreated, heat exhaustion can lead to heat stroke—a life threatening and harder to treat condition. Heat stroke is characterized by extreme exhaustion or collapse, hot, dry skin with elevated body temperature, and impaired mental status—those suffering from heat stroke may not be aware of their danger. Unless treated it leads to loss of consciousness, organ failure, and death. People with heat exhaustion will usually need help—get them out of the heat, cool them off with water or wetted clothing, and if they are conscious and can tolerate it, feed them fluids and food—then help them find the shortest way out of the woods. This may require rescue services. Recovery times can be long and permanent organ damage is possible. If you are doing all of the things you need to do to remain cool(er) and hydrated but you still feel unusually fatigued, consider shortening your hike or turning back. PREPARATION MATTERS
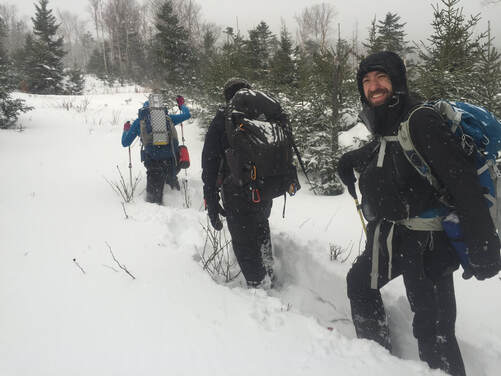
 Hiking in cloudy weather or light rain can be a good option on hot days. DESTINATION AND TIMING In addition to preparing with appropriate gear and self-care, you can also make your hot weather hike more enjoyable by tweaking your itinerary and the timing of your hike. Time of day, season, and weather: Hot spring days can often be harder to bear than hot summer days because of the lack of leaves on deciduous trees and the fact that your skin and body aren't yet accustomed to full-on heat after all that winter hiking—don’t underestimate the difficulty of hot spring weather hiking. On hot days either in spring or summer, it makes sense to start hiking earlier in order to get some miles under your belt before the sun heats up the air. Alternately, you can start hiking later in the morning and enjoy the early evening cool-off along your descent—but keep in mind that (if weather conditions are otherwise constant) early morning temperatures are typically going to be cooler than early evening temperatures. Take advantage of rain forecasts: predictions of light rain on really hot days can be excellent conditions to hike in as long as you don’t mind getting a little wet, but keep in mind that warm rain at low elevations can turn into cold, hypothermia-inducing rain at higher elevations. During the hot summer days of my 1994 Appalachian Trail through-hike I often hiked in the rain in a T-shirt without a rain jacket; this practice not only cooled me off fast it also kept my rain jacket dry for use later in the day and helped wash some of the sweaty crud out of my shirt.
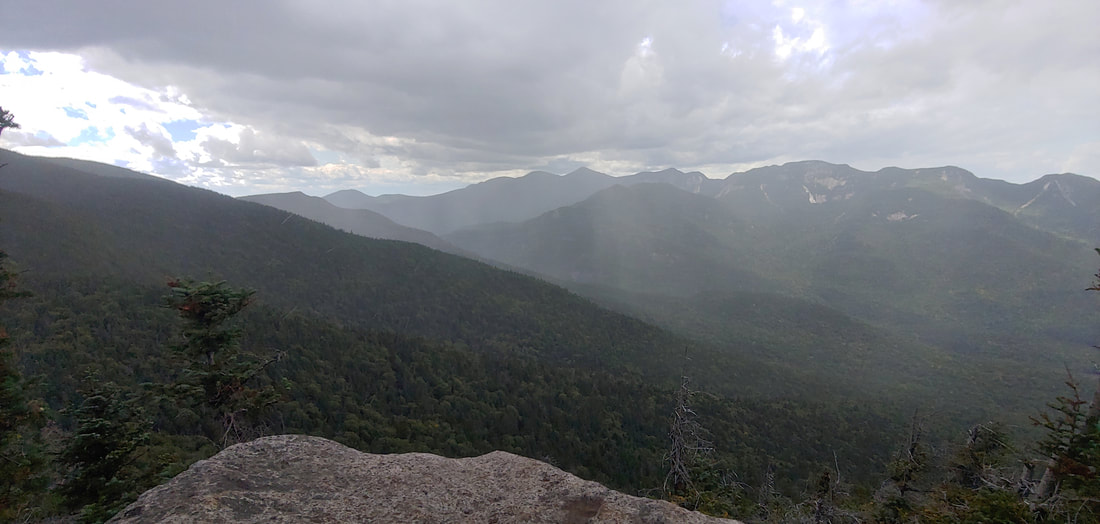
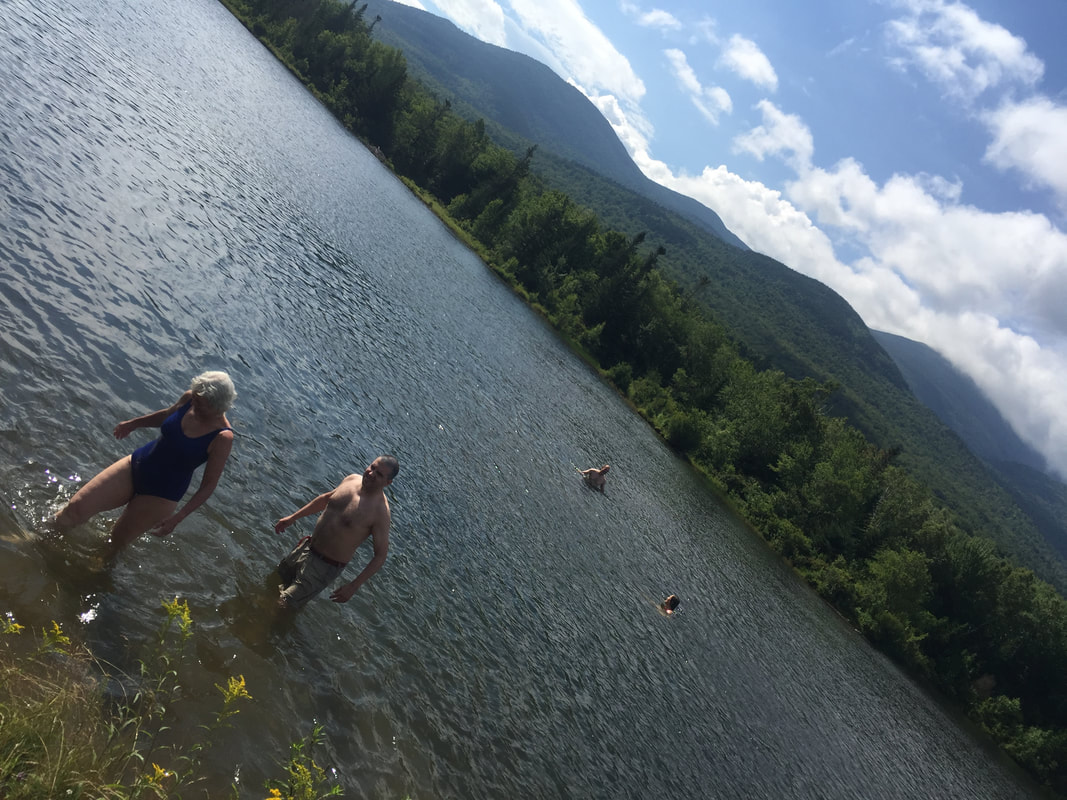
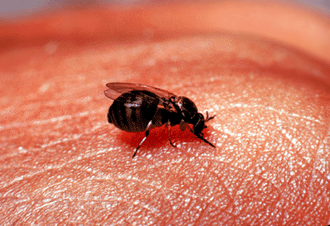
Even lower elevation mountains can offer cooling breezes: on summer days rising hot air in valleys can cause strong updrafts of cooling wind on exposed areas of higher ground, especially around cliff faces. In the northeast, the prevailing natural wind is often from the west or southwest on sunny days, so hiking the western side of the mountain may be windier and more cooling than hiking the eastern side. Keep the sun in mind, though: exposure above treeline may increase the risk of sunburn. Deep, wooded stream valleys are often cooler on average than ridges or flats, and can offer the added pleasure of a dunk in a creek. As a rule, the northerly slopes of mountains are going to be cooler because they have less sun exposure, ridge tops are going to be warmer (but windier if they’re exposed), and oak or pine dominant woods are going to be warmer than maple, birch, or boreal spruce-fir forests. The relative warmth of these forest types also mirrors how soon brooks will dry out in summer. Open fields and meadows are among the hottest landscapes in the summer while areas with significant boulder fields will trap cool air and may even hold ice into the summer; these places can provide drafts of natural air conditioning (some famous examples include places like New Hampshire’s Ice Gulch, Devil’s Hopyard, and Subway in King Ravine, Vermont’s White Rocks Ice Beds and Smuggler’s Notch, and Maine’s Mahoosic Notch, among others). Planning hikes that place a good swimming hole near the end of the hike can be both pleasurable and advantageous; on really hot days plan hikes with swimming holes at several points along the route. By choosing appropriate destinations and routes, and timing your hike with daily heating/ cooling cycles, you can often craft a hike that maximizes comfort on a hot day. For instance, starting early up a wooded ridgeline or warm side of the mountain in the morning (which would be hot in the afternoon), then traversing an open windy ridge mid-day, and finally descending along a cool mountain stream in a forested ravine in the afternoon is an excellent itinerary to beat the heat. 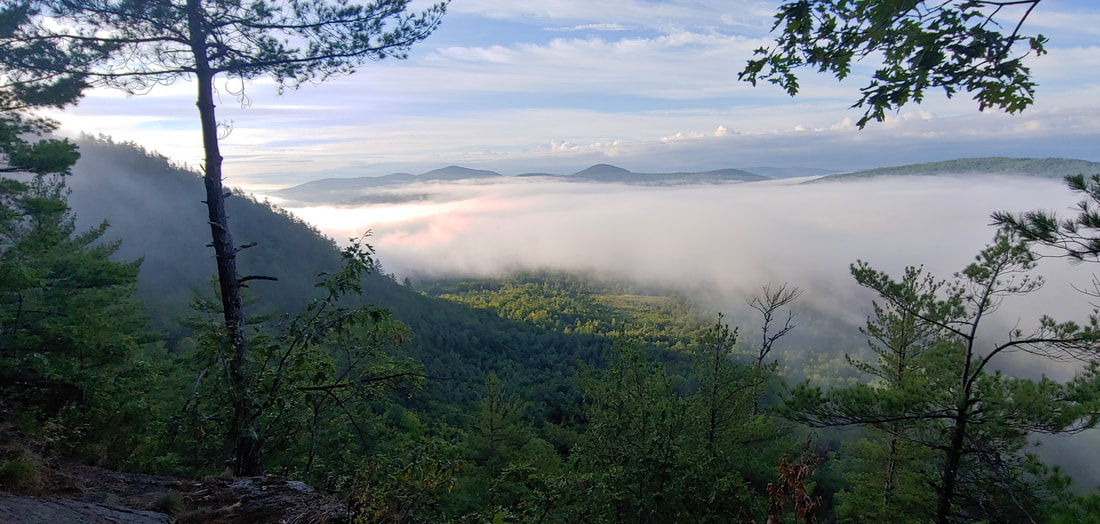 An early morning hike up to Glassface Ledges in Maine on a hot day offered delightful views above the morning valley fog. 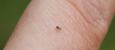 A No Seeum feasting on a finger, to scale. Photo: Creative Commons If you own a tent, you’ve probably noticed that the holes in the bug mesh screening are quite fine—typically over 1,000 holes per square inch, much finer than your average window screen in a house. The holes have to be this fine in order to keep out “No Seeums" (Ceratopogonidae), the tiniest of biting flies, so tiny that you have to squint in order to see them. In fact, if it’s dark out, you won’t see them at all, unless you happen to shine your headlamp closely on one as it feasts on you. No Seeums, also known as “punkies” and “moose flies” are a family of biting midges 1-3 millimeters in length and translucent grey in color. They have a striped wing pattern that is barely visible to the naked eye in larger specimens. Their tiny size (about half to one quarter the size of a Black Fly) and translucent color makes them nearly invisible. If you find yourself suddenly feeling itchy in the dawn or dusk, or after dark, but can’t identify the cause, you may be the victim of a No Seeum attack. Despite their tiny size, their bite packs a punch, and like Black Flies, they slice holes in the skin then lick out the blood. Season & Habitat Here in the northeast, No Seeums are most active in the twilight hours, on moderate to warm nights in the spring and early summer, near wetlands and still bodies of water. They prefer damp conditions; drought will substantially reduce their numbers. Unlike other biting flies, their larvae are not aquatic. No Seeums are not known to be vectors of pathogens in the northeast, but some people are allergic to their bites (the allergy can cause painful, long lasting itchiness). 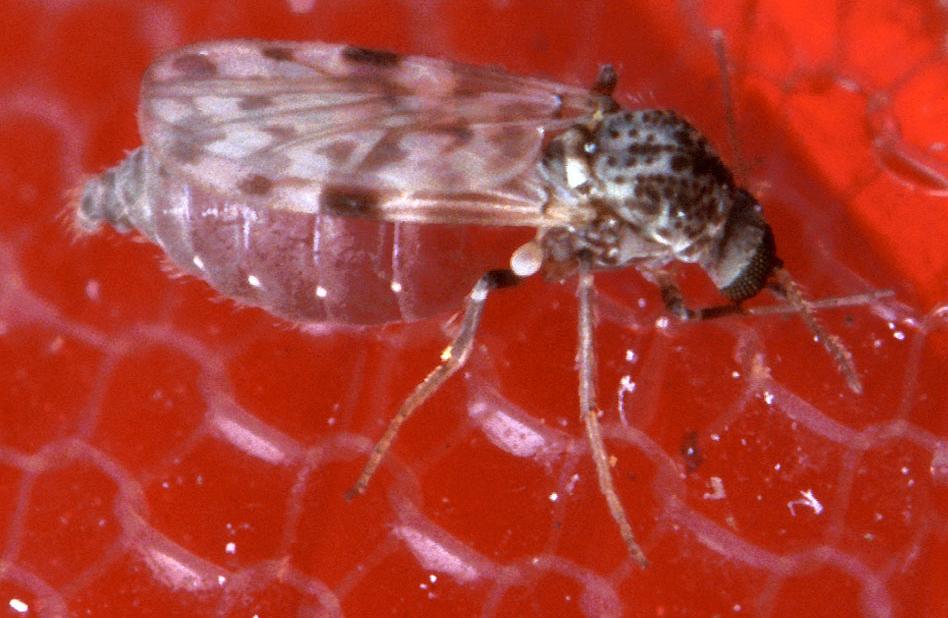 Closeup of a No-Seeum. Photo: USDA Ecology and Behavior Like other species of biting fly, adult No Seeums feed on plant nectars; females will procure blood for nutrients used in egg production. Like mosquitos and black flies, No Seeums tend to attack in mobs. Overall, No Seeums are more localized and less omnipresent than mosquitos and black flies and they tend to travel less far in search of blood; sometimes it is possible to escape them by moving away from their home turf a relatively short distance, and it’s quite easy to out-walk them. I’ve never had a problem with them while hiking—only when I stop and settle down for the evening. They are too tiny to bite through clothing but can easily slip under cuffs and down collars. They will bite any area of exposed skin. They will sometimes pass through house window screens to bite people inside. Thwarting No-Seeums Cold weather or a strong breeze will drive No Seeums away, as will campfire smoke, natural insect repellants (such as lemon-Eucalyptus concoctions) and man-made chemical repellents (DEET, Picaridin) insect repellants. While most tents come equipped with mesh netting fine enough to keep out No-Seeums, you can easily carry them into your tent on your clothing or skin—shine a headlamp near the apex of your tent after you get inside, and squash any that came in with you (or else they will find you later). If you’re sleeping in a lean-to in No-Seeum habitat, they will come inside the lean-to to bite—in which case you could protect yourself with an insect repellent or with an over the sleeping bag mesh bug net—but make sure you buy netting with very fine holes (some cheap bug nets on the market aren’t fine enough to keep out No Seeums). There are few fates more torturous than being bit all night by nearly invisible bugs. If you do end up reacting to No-Seeum bites, consider anti-inflammatory creams containing Benadryl or other salves to reduce itchiness.
Black Flies (Simuliidae) are speedy black gnats that attack in mobs. They are completely black in color and have a distinctly hunched thorax. There are over 2,000 species of black fly worldwide with over 200 species in the United States alone. Black flies are sometimes mistaken for “eyeball gnats” (Liohippelates--a late spring/ summer species of annoying gnat which licks the eye mucus of animals but doesn’t bite) and other small, non-biting flies that tend to congregate in large numbers in the spring (mayflies for instance) but aren’t attracted to human beings. Season and Habitat Black Flies only breed in fast-flowing water (they love mountain streams); their larvae attach to rocks and filter feed on algae and bacteria. The adults emerge from the water in the spring. Since spring is relative to elevation as well as latitude, “black fly season” in the northeast may end in the lowlands just as it is beginning on the peaks. Dry spring weather will knock populations down; wet springs will bring them out with a vengeance. Most black fly populations are done by mid-July even at the highest elevations. Occasionally, in the late summer, if conditions are sufficiently wet, a few black flies may return, but these are usually short-lived, localized outbreaks. Black flies are intolerant of polluted waters, so a robust black fly population can be a good indicator of a healthy aquatic habitat. Many animals feed on black flies including various bird species, other insects (like dragonflies), fish, (especially trout), and amphibians.  Black fly larvae attached to rock in a brook (photo: USDA) Ecology and Behavior Male and female black flies feed on plant nectars, not blood. Only the female black fly will bite for blood: she does so to procure nutrients for egg production. Although black flies aren’t known to be a host to pathogens in the northeast United States, they do leave painful, itchy, and lingering welts. Unlike mosquitos-- connoisseurs who delicately drill into their hosts-- black flies are butchers; they gouge a tiny hole in the skin with their knife-like mouthparts, apply an anticoagulant saliva, and then lick up the blood. They prefer to bite high but will go low often enough to keep you guessing—I’ve found black flies biting between my sandaled toes from time to time. Black flies have acute senses for detecting hosts from a distance but they tend to be somewhat more attracted to darker clothing (which more closely resembles animal fur). When black flies are in full swing they can assault you in such numbers to make you want to jump off a cliff. They tend to fly around annoyingly for quite a while, landing briefly again and again before they settle down to bite. This is a successful tactic (and possibly a genetically coded behavior--one shared by other species of biting flies): the more you aggravate the victim, tickling their skin and making them fruitlessly swat around, the harder it is for the victim to notice when and where the fly lands and bites. Black flies are masters at finding the tiniest patch of skin unprotected by bug repellent—you could take a bath in bug repellent and a black fly will still find that one spot you missed or rubbed it off. They will crawl into your clothing around cuffs to bite beneath. Even when they are not biting, they will get in your eyes, mouth, and ears and will tickle your skin. Black fly bites itch maddeningly, which benefits the black fly population as a whole --itched wounds will bleed and become desensitized to biting, making it easier for other black flies to procure blood from you. 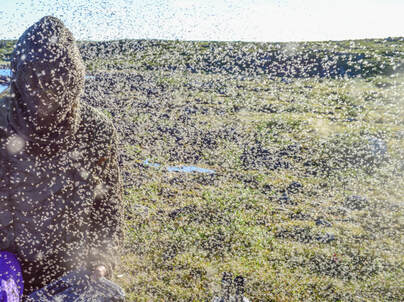 Black flies swarming in the arctic (photo: NicolasPerrault, Creative Commons) Thwarting Black Flies Bug repellent is a must during black fly season (take it with you, as it will wear off when you sweat); I don’t find much difference between manufactured chemical repellents (DEET, Picaridin), or natural repellents (such as lemon-Eucalyptus concoctions, etc.) but I do find that I have to apply a lot of it to discourage black flies and re-apply it during the hike when I sweat it off. I apply it to all areas of exposed skin (except around my eyes, lips, and nostrils), on my hat, and around my collar and cuffs. Even this will not stop them from flying annoyingly around my head. I always wear a hat or keep handy a bandanna to cover my head, and I keep a mesh head net in my pack for the worse black fly days. Black flies are good enough reason to avoid some places altogether in the spring (in the arctic and subarctic spring they can be numerous enough to be life-threatening), but you can pick your days carefully: cold weather or a stiff wind will thwart them (but as soon as you take shelter from the wind, they will be waiting there for you). Black flies are active only during the day and will avoid dark places—you can take refuge from them in the back of a lean-to, an overhang cave, or even a dense thicket of evergreens. They will mob you most when you are taking a break, and they tend to loiter in places where hikers congregate. The longer you stop, the more black flies will find you. Keeping up a good hiking pace can reduce biting—although black flies are fast, a moving target is harder for them to zero in on. When resting, I’ve sometimes succeeded in diverting some of their mob by placing my sweaty backpack as a scent decoy a few feet away from me and watching while they fruitlessly attack it. When camping, the smoke from a fire can discourage black flies (in old time outdoors language, lighting a fire for this purpose is called "smudging"). Because you will not be able to avoid getting bit by black flies if you hike in the northeast in the spring, it’s helpful to have a salve of some kind to coat your black fly bites and keep the itching down. |
TOPICS
All
Humor (The Parsnip)
|

 RSS Feed