“Slog” is a very apt term for what is a sadistic exercise in mental endurance—especially at the end-of-day whilst physically exhausted, when distance-marking visual cues have evaporated in dusk. For those "slogged" When will it end? isn’t an uncommon fixation. Beyond the madness-inducing tedium, the slogs can also be physically painful. I have a longstanding knee injury; hiking flat terrain for a long stretch is harder on my knee than ups or downs because I’m locking my knee in a relatively rigid position and inviting repetitive-use fatigue instead of flexing out the kinks as would naturally happen on irregular mountain terrain. Doing this in snowshoes or boots over hardpan monorail can be even more grueling. Although my handicap isn’t universal, I’ve spoken to more than a few people, both knee and hip-impaired, who have the same issue with the slogs.
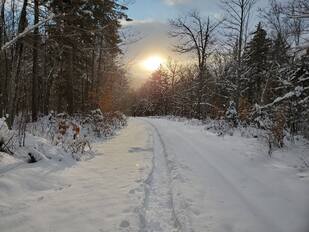
. . .and yes, it counts towards your winter list dibs. As long as snow conditions are favorable, you can shave off a little time, a lot of fatigue, and add a little extra fun into your adventure. I use this method almost exclusively for the long flat winter approaches, and I weep with pity as I pass those poor wretches limping out in snowshoes. How it helps:
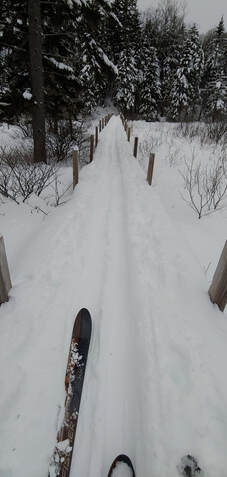
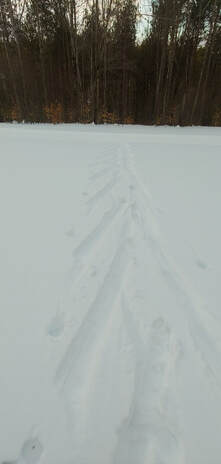
What approaches it's good for: Out-and-back hikes with long, relatively mild terrain: Lincoln Woods Trail, Zealand Road, Sawyer River Road, Gale River Road, etc. In Maine, it can be used to get to some of the “Sixpack” Hundred Highest Peaks, Mount Abraham via the snowed-in Firewarden’s Road, and to the base of Katahdin or the Brothers in Baxter State Park (lugging a sled into the park behind your skis, which is surprisingly easy). If you’re a fair skier you can even get a little further up some of the milder but narrower trail sections beyond the roads mentioned above, and if you’re a skilled skier you can throw in some steeper trails and open woods glade runs if conditions are right. When to do it: When the snow is good—deep enough to cover hard obstacles and exposed drainage channels. Ideally, the snow is broken out and not too icy or crusty; temperatures are below freezing. If snow is deep and unbroken, and you have company, you can take turns breaking it out with about the same effort or less as you’d expend with snowshoes, creating nice runs for yourself on your return trip. It is easier to ski out on a once-broken ski trail than it is to snowshoe out on a once-broken snowshoe track because the track of skis is continuous, flat, and uninterrupted, not choppy like snowshoes tracks. Avoid icy conditions and unbroken snow with thick crusts. Avoid trails with frequent or long steeps (unless you are a good skier), lots of narrow twists and ledge-hops, and open water crossings.
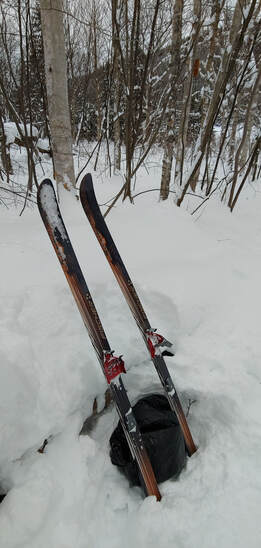
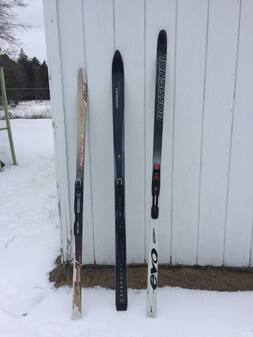
Gear you’ll need: Skis: Your best bet are medium to wide Nordic skis--many recent models are “shaped” (the width of the skis changes from the front to the ski to the middle, and again to the rear of the ski) which offers more turning capacity; look for outer measurements in the high 60cm range to the 112cm range. Generally speaking: the wider the ski, the more floatation, stability, and turning ability. You can use narrower Nordic skis with equal success if the terrain is milder, groomed, or fairly beaten out by other skiers (Lincoln Woods Trail and Zealand Road are often well broken out by skiers) or if you’re a good skier. The length of your ski will depend upon the characteristics of your ski brand and style vs. your weight— check the manufacturer’s guidelines. Other ski characteristics: you’ll want a steel edge to cut through rougher snow patches, and a climbing pattern on the bottom of the ski for ascending (which saves you the curse of wax-on, wax-off, repeat--visualize the Karate Kid--with different kinds of waxes for different temperatures and conditions).
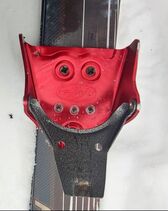
Boots: First and foremost, make sure that your boots are compatible with your bindings! The hardware on ski boots is engineered to only work with a specific kind of binding. Second, you’ll want something light and fairly flexible for the long slogs; go with synthetic fabric or leather (not hard plastic). Third, make sure that you buy boots that have adequate winter insulation. Although you can hike in Nordic boots, you may not find them quite as comfortable on steep mountain terrain as hiking boots, but you can experiment—if you don’t mind hiking in them, you can save yourself some weight by not carrying hiking boots on your trip. The ducktail toe on 3-Pin boots might interfere with snowshoe and traction bindings, however. 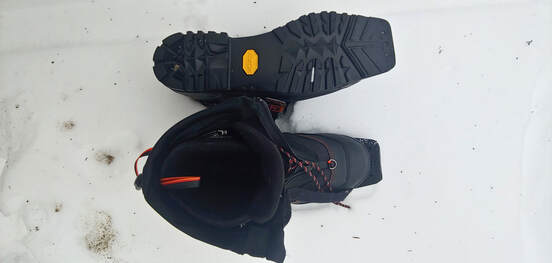 Nordic boots built for use with 75 mm 3-pin bindings. Note the three holes and duckbill at the front sole of the boot. Poles: Ski poles or adjustable trekking poles with a snow basket attachment will both work fine. A wider basket is preferable for deeper, unbroken or minimally broken snow but a small trekking basket may work just as well on packed or groomed surfaces. I keep a wide basket on my poles all winter long. 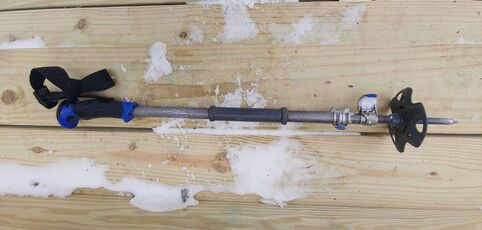 Collapsible Black Diamond ski/trekking pole with wide snow basket. Gear you might want: Climbing skins (a fabric that is stretched across the bottom of the ski for extra traction) can be useful in places where the terrain is rolling with frequent short steep sections, and the snow is firm and slick. You can use the skins to help you climb and to slow your descent. A small plastic ski scraper can come in handy if you happen to slush your skis through running water on colder days. Several ski gear manufacturers make lightweight packable models (ex. Swix and Dakine); while most are intended to scrape wax off skis, they will work well for ice, too (if you have a climbing traction pattern on your skis, be sure to scrape front to back). If you plan on carrying your gear over some steep terrain for moderate stretches, take along a ski strap so that you can tie your skis together and throw them over your shoulder. Most skis come with a ski strap when you purchase them. Gear you probably won’t need: Unless a lot of your travel is going to be downhill on long steeps, avoid gear that is intended specifically for downhill. Traditional downhill (lift-service) alpine skiing gear is useless on the slogs. "Backcountry" alpine gear (AT bindings, NTN bindings, 75mm 3-pin bindings with fixed, non-removable cables, etc.) is intended primarily for climbing up then skiing down. Although you can manage flat terrain with them, they won’t offer you the speed and ease of use on long slogs that Nordic gear provides. If you’re inclined to do a lot of “hike-up, ski down” activity (for example the Moosilauke Carriage Road and the Hale Firewarden’s Trail) these are probably the kind of setups you’ll want to look at. But that kind backcountry skiing takes skill and practice and is beyond the scope of this article. Another type of ski that probably won’t net you much in the way of energy savings on the slogs are short, “hybrid” skis" (ex. Altai Hoks or Black Diamond Glidite) that strap to hiking boots. These skis can be great fun for narrow and/or steeper downhill terrain, particularly in powdery snow and/or on bushwhacks and narrow, winding paths, and for climbing moderately steep irregular terrain. On the long flats and mild rolling terrain, they will perform more like snowshoes than skis on average (better than snowshoes on moderate downhills).
That’s all folks—this article is intended as a primer; there’s more you can learn about skis and skiing. Hope to see you cheerfully beating the slogs in skis! This article was inspired by a recent conversation on the Random Group of Hikers FB page.
0 Comments
Leave a Reply. |
TOPICS
All
Humor (The Parsnip)
|

 RSS Feed